Description
Discover the only dough recipe you’ll ever need! This versatile all-purpose master dough creates perfectly soft, fluffy bread for everything from dinner rolls to pizza crusts to cinnamon buns. Made with pantry staples and foolproof techniques, this reliable recipe delivers bakery-quality results every time. The balanced combination of ingredients creates a dough that’s easy to work with and stays fresh longer than other recipes. Perfect for busy women who want homemade bread without the fuss!
Ingredients
- 1 cup warm milk
- 1 cup warm water
- 1/2 cup vegetable oil
- 1 tablespoon sugar
- 2 tablespoons active dry yeast
- 1 teaspoon baking powder
- 1 teaspoon salt
- 1 tablespoon white vinegar
- 5 cups all-purpose flour
Equipment:
- Large mixing bowl
- Measuring cups and spoons
- Wooden spoon or spatula
- Clean kitchen towel or plastic wrap
- Baking sheets or pans (depending on final use)
Instructions
Instructions:
Step 1: Activate the Yeast
In a large mixing bowl, combine the warm milk, warm water, sugar, and yeast. Stir gently to dissolve the sugar and distribute the yeast. Let this mixture sit for 10 minutes until it becomes foamy and bubbly. This step confirms your yeast is active and ready to work its magic.
Step 2: Add Wet Ingredients and Leavening
Once your yeast mixture is foamy, add the vegetable oil, white vinegar, salt, and baking powder to the bowl. Stir well to combine all these ingredients. The vinegar and baking powder might seem like unusual additions, but they’re key to this dough’s remarkable texture and reliability.
Step 3: Incorporate the Flour
Begin adding the flour one cup at a time, stirring with each addition. This gradual approach allows the flour to absorb the liquids properly and prevents flour clouds in your kitchen. After adding about 3-4 cups, the mixture will become too thick to stir with a spoon—this is when you’ll switch to kneading with your hands.
Step 4: Knead to Perfection
Turn the dough out onto a lightly floured surface and knead for 8-10 minutes. This step develops the gluten structure that gives your finished bread its wonderful texture. The dough is ready when it feels smooth and elastic, and no longer sticks to your hands. It should spring back when lightly pressed with a finger.
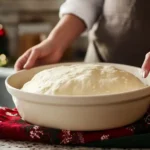
Step 5: First Rise
Place the kneaded dough in a lightly oiled bowl, turning once to coat the surface. Cover with a clean kitchen towel or plastic wrap and let it rise in a warm, draft-free place for about an hour, or until doubled in size. In summer, this might take less time; in winter, possibly a bit longer.
Step 6: Shape and Create
After the dough has doubled, gently punch it down to release air bubbles. Now it’s ready to become whatever you need! Divide and shape as desired for rolls, loaves, pizza, or sweet treats. Place your shaped dough on appropriate baking sheets or in pans.
Step 7: Second Rise and Bake
Cover your shaped dough and allow it to rise again until puffy—usually 30-45 minutes depending on the size of your creations. Baking temperatures and times will vary based on what you’re making:
- Dinner rolls: 375°F for 15-18 minutes
- Loaf bread: 350°F for 30-35 minutes
- Pizza crust: 450°F for 12-15 minutes
- Cinnamon rolls: 350°F for 20-25 minutes
Your creations are done when they’re golden brown and sound hollow when tapped on the bottom.
Notes
Note 1: Liquid Temperature Matters
For perfect yeast activation, your milk and water should be warm but not hot—aim for 105-110°F (40-43°C). It should feel comfortably warm on your wrist, similar to testing baby formula. Too cool and your dough will rise slowly; too hot and you’ll kill the yeast.
Note 2: The Kneading Test
Know when your dough is properly kneaded by using the “window pane test.” Take a small piece of dough and gently stretch it between your fingers. If it stretches thin enough to see light through it without tearing, the gluten is well-developed and your dough is ready.
Note 3: Creating the Ideal Rising Environment
For the perfect rise every time, create a warm, draft-free environment. Turn your oven on to the lowest setting for just 1-2 minutes, then turn it off. Place your covered dough in the slightly warmed oven with the door closed. The residual warmth creates an ideal rising environment.
Note 4: Oil vs. Flour Your Hands
When working with this dough, lightly oil your hands rather than flouring them when shaping sticky portions. This prevents adding extra flour that could make your final product dense, while the oil keeps the dough from sticking to your fingers.
- Prep Time: 25 minutes
- Cook Time: Varies by use (15-35 minutes)
- Cuisine: American